Introduction:
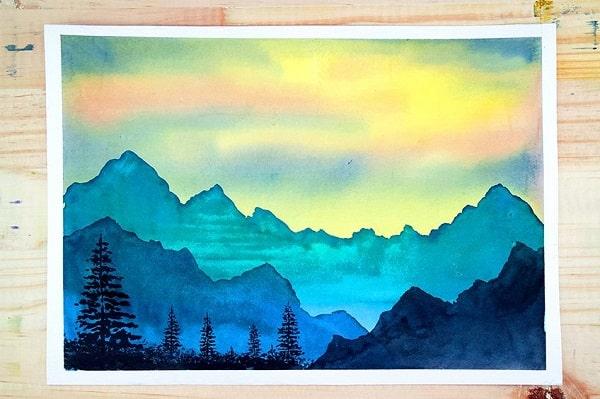
Watercolor painting has always captivated artists with its fluidity and translucency, and capturing the serene beauty of mountains in watercolor is an art form in itself. The allure of mountain landscapes in watercolor lies in the delicate balance required to depict their intricate terrains. In this comprehensive guide, we delve into how to paint mountains in watercolor, providing insights, techniques, and tips for both beginners and intermediate artists.
Understanding the Purpose:
The purpose of this guide is to serve as a reliable companion for artists looking to create awe-inspiring watercolor mountain landscapes. Whether you’re starting your artistic journey or seeking to enhance your skills, this guide aims to equip you with the necessary tools and knowledge.
Personal Journey: My First Mountain Painting:
Embarking on the journey of painting mountains in watercolor can be a profound and emotional experience. Reflecting on my initial attempt at capturing the essence of nature through watercolor, it was a transformative moment. Every stroke, every blend of color aimed to convey the grandeur and tranquility of the mountains. It’s an exploration that allows artists to connect deeply with nature’s beauty.
Understanding Your Materials:
Selecting the right watercolor supplies is paramount in creating stunning mountain landscapes. Watercolor paints with a range of colors, quality brushes for intricate detailing, watercolor paper that supports the medium, and palette for mixing colors are essential tools. Setting up an efficient workspace with proper lighting and ventilation ensures a conducive environment for artistic expression.
Basic Techniques:
Before diving into painting mountains, mastering basic watercolor techniques is crucial. Understanding wet-on-wet and wet-on-dry techniques, controlling water and pigment ratios, and experimenting with brush strokes are foundational skills. Layering colors to create depth and texture adds dimension to your mountain landscapes.
Step-by-Step Guide:
To paint mountains in watercolor, follow these practical steps:
- Sketching the Mountain Silhouette: Outline the mountain’s shape and contours lightly.
- Building the Background: Start with light washes for the sky, gradually transitioning to distant mountains using cooler tones.
- Mid-ground and Foreground: Layer mountains with deeper shades, adding details to create depth.
- Refining Details: Use a fine brush for intricate details like rocky textures and tree lines.
- Adding Final Touches: Blend colors, adjust contrasts, and highlight focal points for a harmonious composition.
Advanced Tips:
To elevate your watercolor mountain landscapes:
- Master Atmospheric Perspective: Create depth by using lighter hues for distant mountains and darker tones for closer ones.
- Incorporate Elements: Introduce trees, lakes, or clouds to enhance the scene’s realism and depth.
- Experiment with Textures: Explore different techniques like splattering, sponging, or lifting to create varied textures in your paintings.
Common Mistakes:
Avoid pitfalls in watercolor mountain painting:
- Overworking the Paper: Excessive layering can cause the paper to buckle or lose its texture.
- Ignoring Color Mixing: Inaccurate color mixing can result in muddy or unrealistic mountain hues.
- Lack of Patience: Rushing through the painting process may lead to unsatisfactory results.
Inspirational Examples:
Viewing artworks from accomplished artists can provide inspiration and insights into various techniques. Explore diverse watercolor mountain landscapes to spark creativity and discover unique approaches to portraying nature’s beauty.
Conclusion:
In the artistic journey of painting mountains in watercolor, patience, persistence, and experimentation are invaluable companions. Embrace the challenge, immerse yourself in the beauty of landscapes, and let your creativity flow onto the canvas.
